Introduction to Custom Fonts
To use a custom font on a Squarespace 7.1 website, you’ll need to license a font from a type foundry, collect the necessary file types, upload them to Squarespace via the Custom CSS window, then reference them to apply where you’d like. See below for code snippets and more instructions.
Welcome to our guide on how to use custom fonts on Squarespace 7.1 websites. Whether you're a designer or a small business owner, the right font can make all the difference in the look and feel of your Squarespace website. Out-of-the-box Squarespace 7.1 offers a wide range of options for customizing your site—but when it comes to uploading a custom font, Squarespace is arguably more complex than other platforms to implement.
This guide will walk you through the process step-by-step so that you can add custom fonts to Squarespace. We'll show you how to upload custom fonts, use them in paragraphs and heading styles, and apply various font options via CSS.
Select a font for your Squarespace site
Before installing a custom font in Squarespace, we must first purchase one. Selecting the right font for your website is crucial as it sets the tone and personality of your brand and can also affect the readability and user experience. But finding just the right one can be a challenge, as hundreds of thousands of different fonts are on the market. Here are a few things to remember as you start your search.
What to consider when finding a new font.
Readability: Choose a font that is easy to read on various screen sizes and devices. Sans-serif fonts such as Open Sans and Roboto are popular choices for web design because of their clean and simple design.
Branding: It should align with your brand's personality, style, and overall vibe. Ideally, your brand fonts will perfectly match your logo, making the selection of which font to pick a no-brainer.
Pairing: Consider pairing your font with others for different parts of the website. A complementary font can be used for headlines and titles, while a simpler font can be used for body text. Be careful, though, as too many fonts can be overwhelming!
Accessibility: Make sure the font is accessible to all users, including those with visual impairments, using web-safe fonts and a proper color contrast ratio when designing your site.
Where to license custom fonts.
There are thousands of incredibly talented type foundries worldwide, some ranging from one-person teams to multi-continental studios. It would be impossible to list them all here or even scratch the surface of "the best" ones to look at—so here are just ten independent type foundries that we've personally bought a custom font from and would gladly recommend.
Pangram Pangram
Grilli Type
Commercial Type
Klim Type Foundry
Colophon Foundry
LuziType
CoType Foundry
Diplaay Type
Connary Fagan
Swiss Typefaces

Of course, there are also plenty of marketplaces like Creative Market, Envato, and Etsy, where people around the globe go to sell their own custom font files. Typewolf is also a great resource to have on hand. They showcase an extensive collection of fonts in use—you might be surprised how many of their suggestions are already in Adobe fonts!
Typeface Licensing
Licensing fonts from an independent type design studio typically involves purchasing the right to use them for a specific purpose or period. The details of the license agreement, such as usage rights, the number of users and devices, and the length of the license, can vary depending on the typeface and studio.
It's essential to understand how you will use the font before purchasing. If you only intend on using the font on your Squarespace site, then a Web License will do just fine. But, if you're planning on using this font for your business's brand in the long term and want to install it on your computer for more than just web use, it would be best to purchase a Web License and a Desktop License. Some type foundries offer a very generous license, allowing you to use the font however you'd like with just one license—those are our favorite!
Collect the right font files for web use
Now that you've discovered and purchased the perfect custom font for your Squarespace website, it's time to prepare the files for upload. But there are a few things you'll need to know to set things up properly.
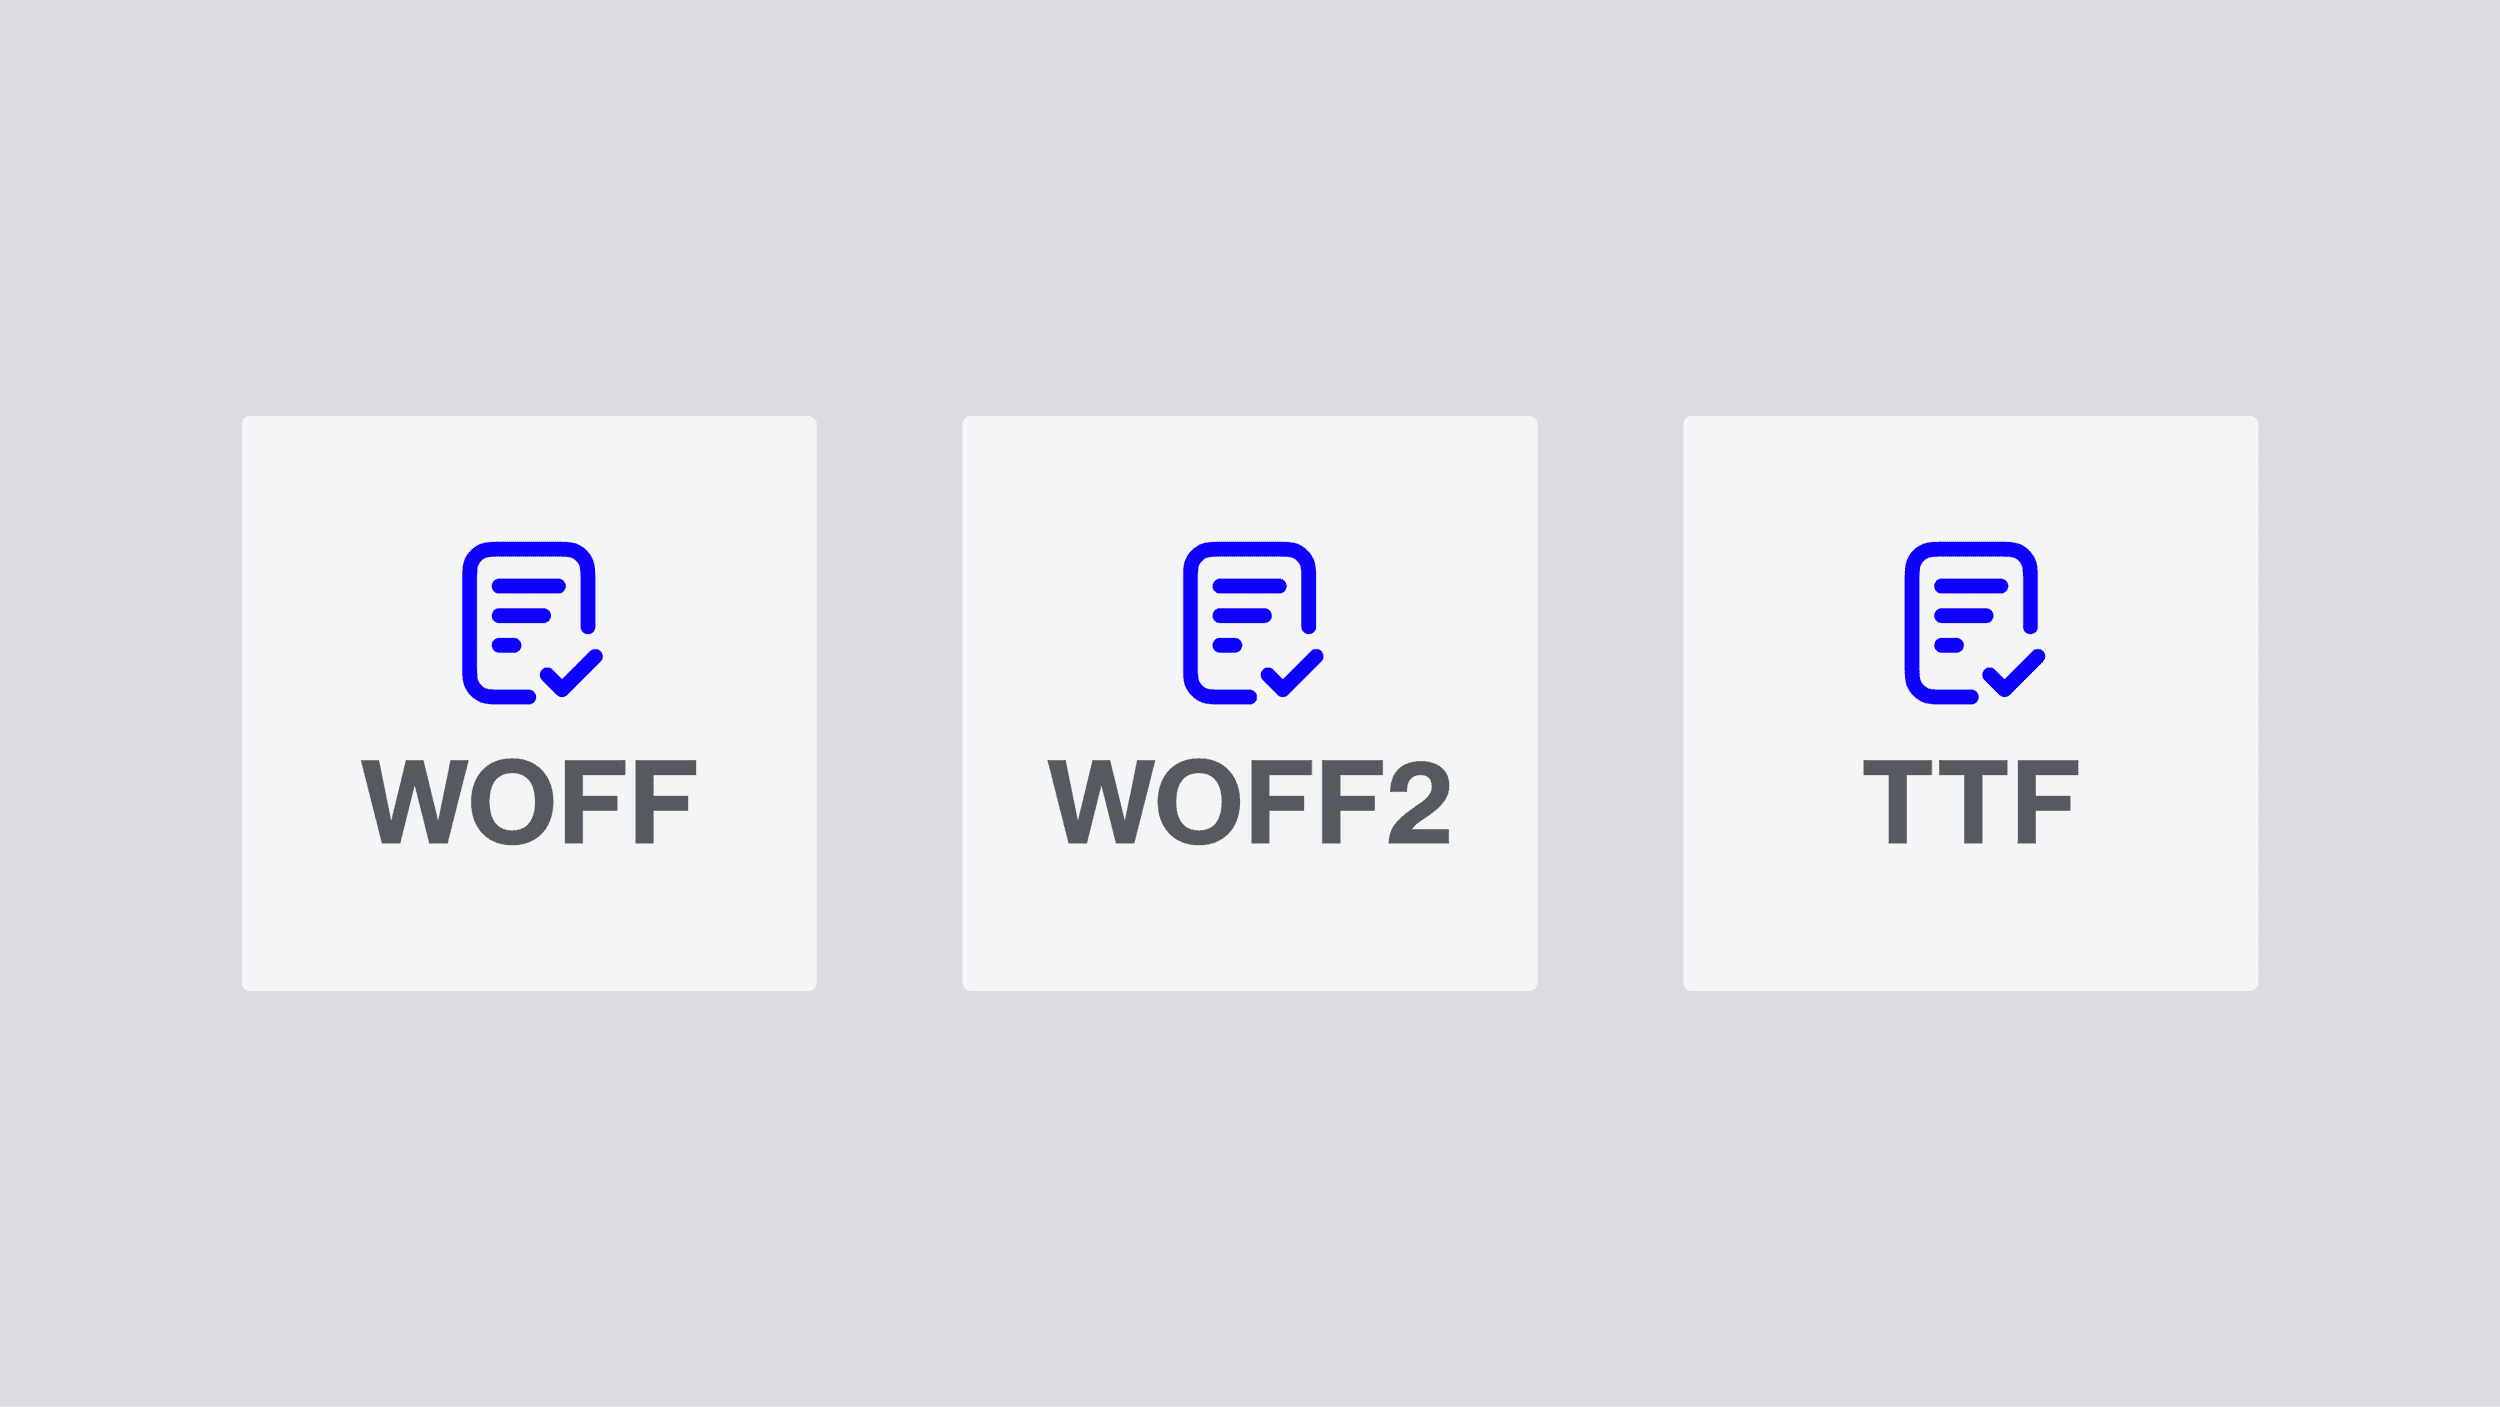
What file types are needed?
Web Open Font Format (WOFF) and WOFF2 are modern formats specifically designed for web use. They are compressed versions of traditional font formats such as TrueType (.ttf) and OpenType (.otf), which makes them smaller in file size and faster to load on web pages. Most modern web browsers support these formats, including Chrome, Firefox, and Safari.
In addition to .woff and .woff2, it's also a good idea to have a .ttf (TrueType) font file to upload. This older format was more commonly used in the past and is still supported by some older browsers. Including these additional formats ensures that your custom fonts will display correctly on all browsers.
At a minimum, you will need WOFF and WOFF2 file types—but to be safe, it's best also to have the TTF format to accommodate different browsers. If you purchased a Web License, you likely wouldn't see TTF as an option. However, a straightforward workaround is simply converting the WOFF file type into the correct format using a tool like Convertio. Just make sure you're following the terms you agreed to in the license, and don't use the TTF file to install on your computer.
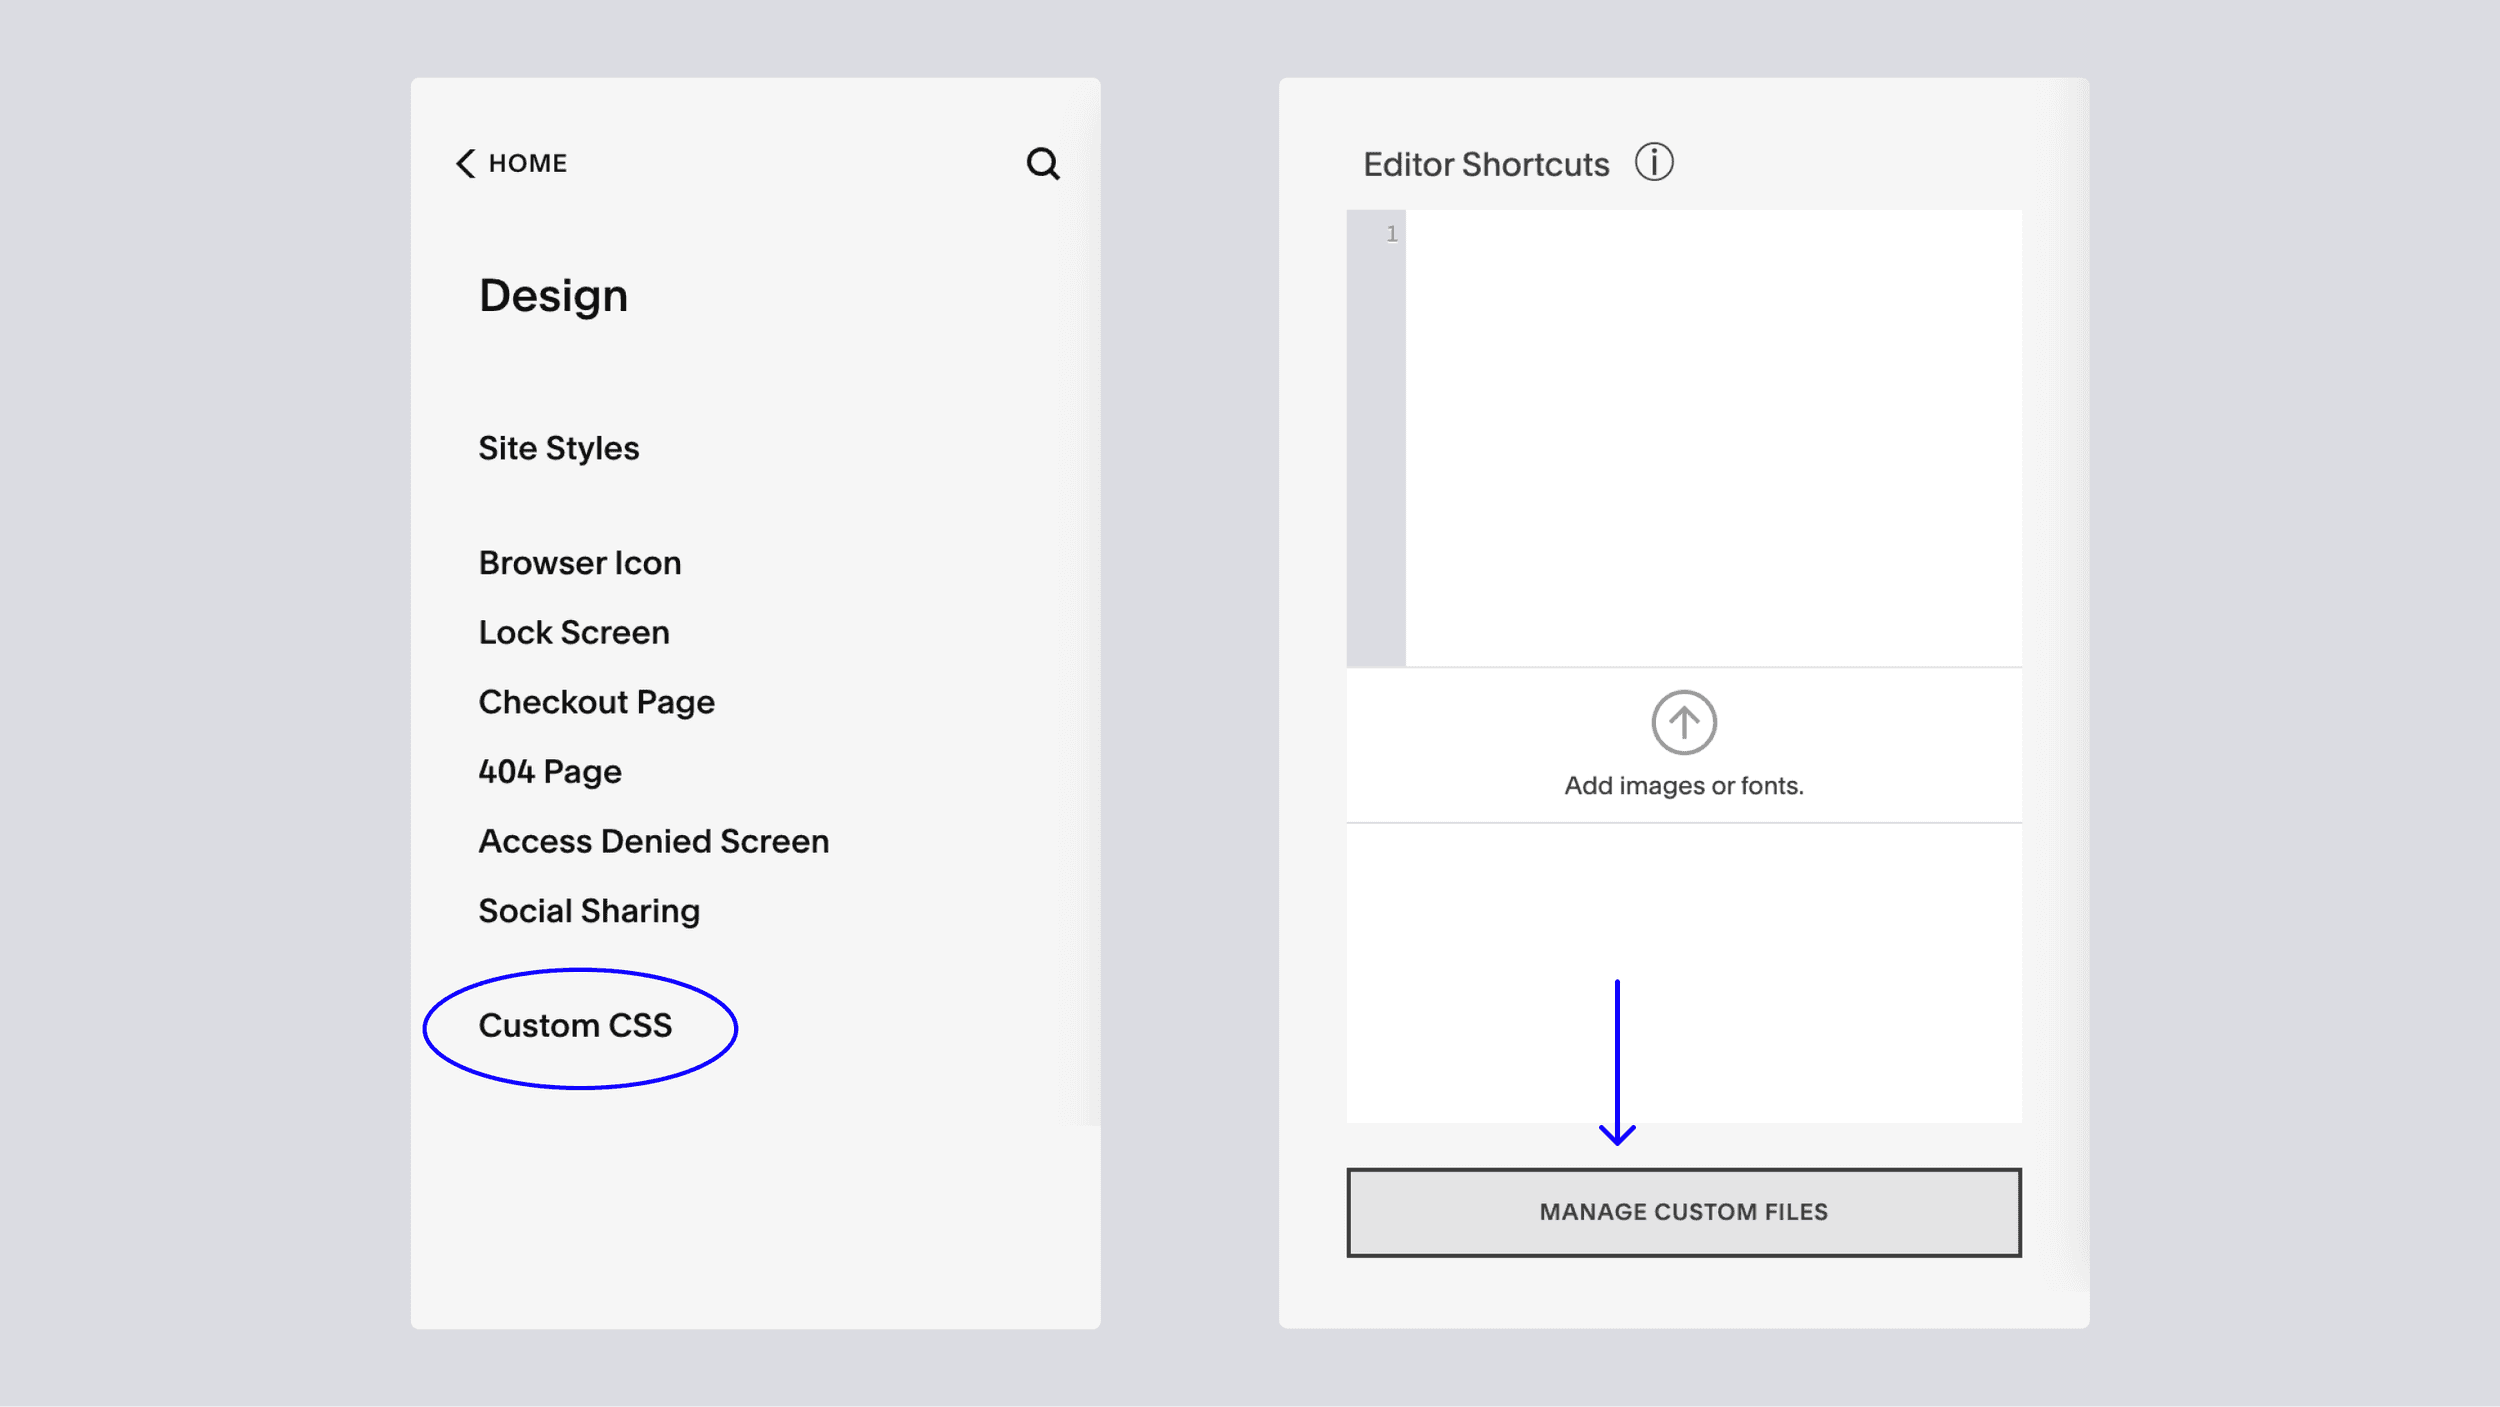
Upload your custom font file in the Custom CSS window
Time to upload the font to your Squarespace website! Go ahead and fire up Squarespace in the browser of your choice, then navigate to the "Design" panel from the Squarespace dashboard. At the bottom, you'll see Custom CSS—from there, scroll to the bottom again and see "Manage Custom Files." This is the only place where we can upload custom fonts in Squarespace.
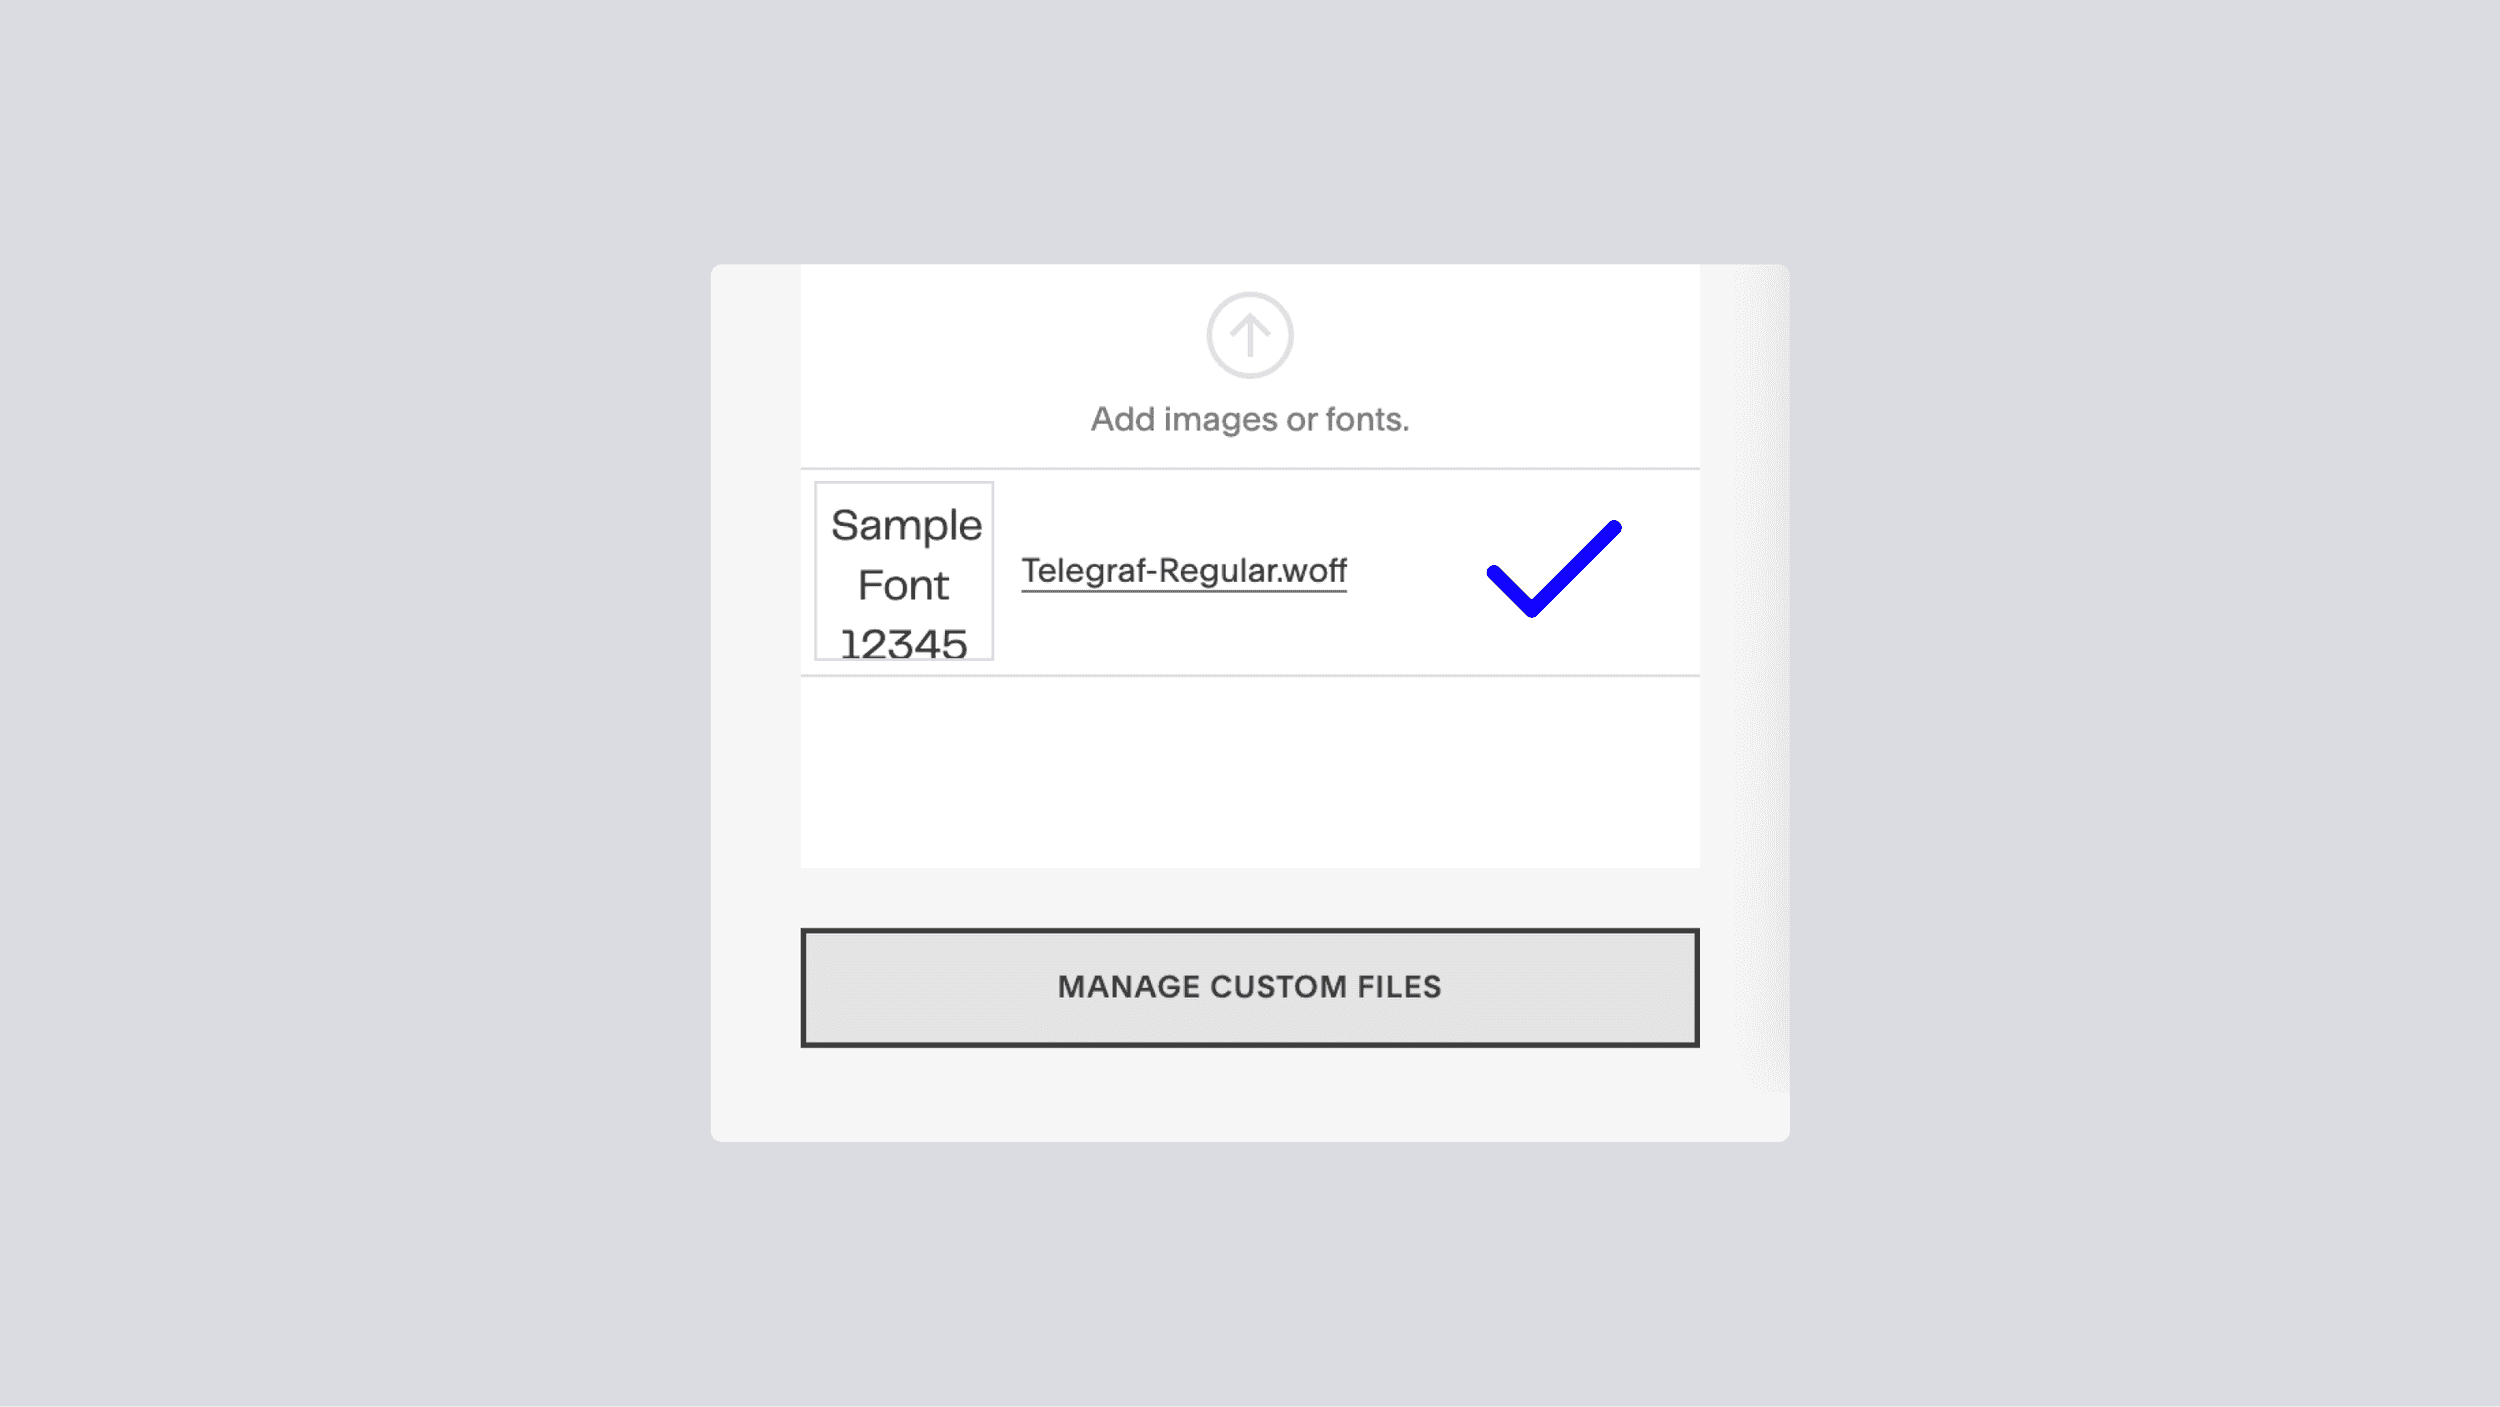
Click "Manage Custom Files" at the bottom of the Custom CSS window, and the file drawer will pop up, allowing you to drag in your custom font files one by one simply. Once successfully uploaded, you'll see them populate the list as you bring them into Squarespace. Note: You must do it one at a time; bulk adding will not work!
Reference the font in Custom CSS
Next, we'll link to the font file in the Custom CSS box. This tells Squarespace where to find it and allows you to use it as a part of your site's design. You'll also need to tell Squarespace which font name (font family) you want to use. To do this, we'll use an existing CSS rule called @font-face. The @font-face rule allows us to specify the location of our custom font file and then tell our page how that font should be displayed when we want it used for text on our site.
Open up the Custom CSS editor and add these lines of code:
//--- Your Custom Font ---//
@font-face{
font-family: 'YOUR FONT';
src:
url('TTF URL HERE') format('truetype'),
url('WOFF URL HERE') format('woff'),
url('WOFF2 URL HERE') format('woff2');
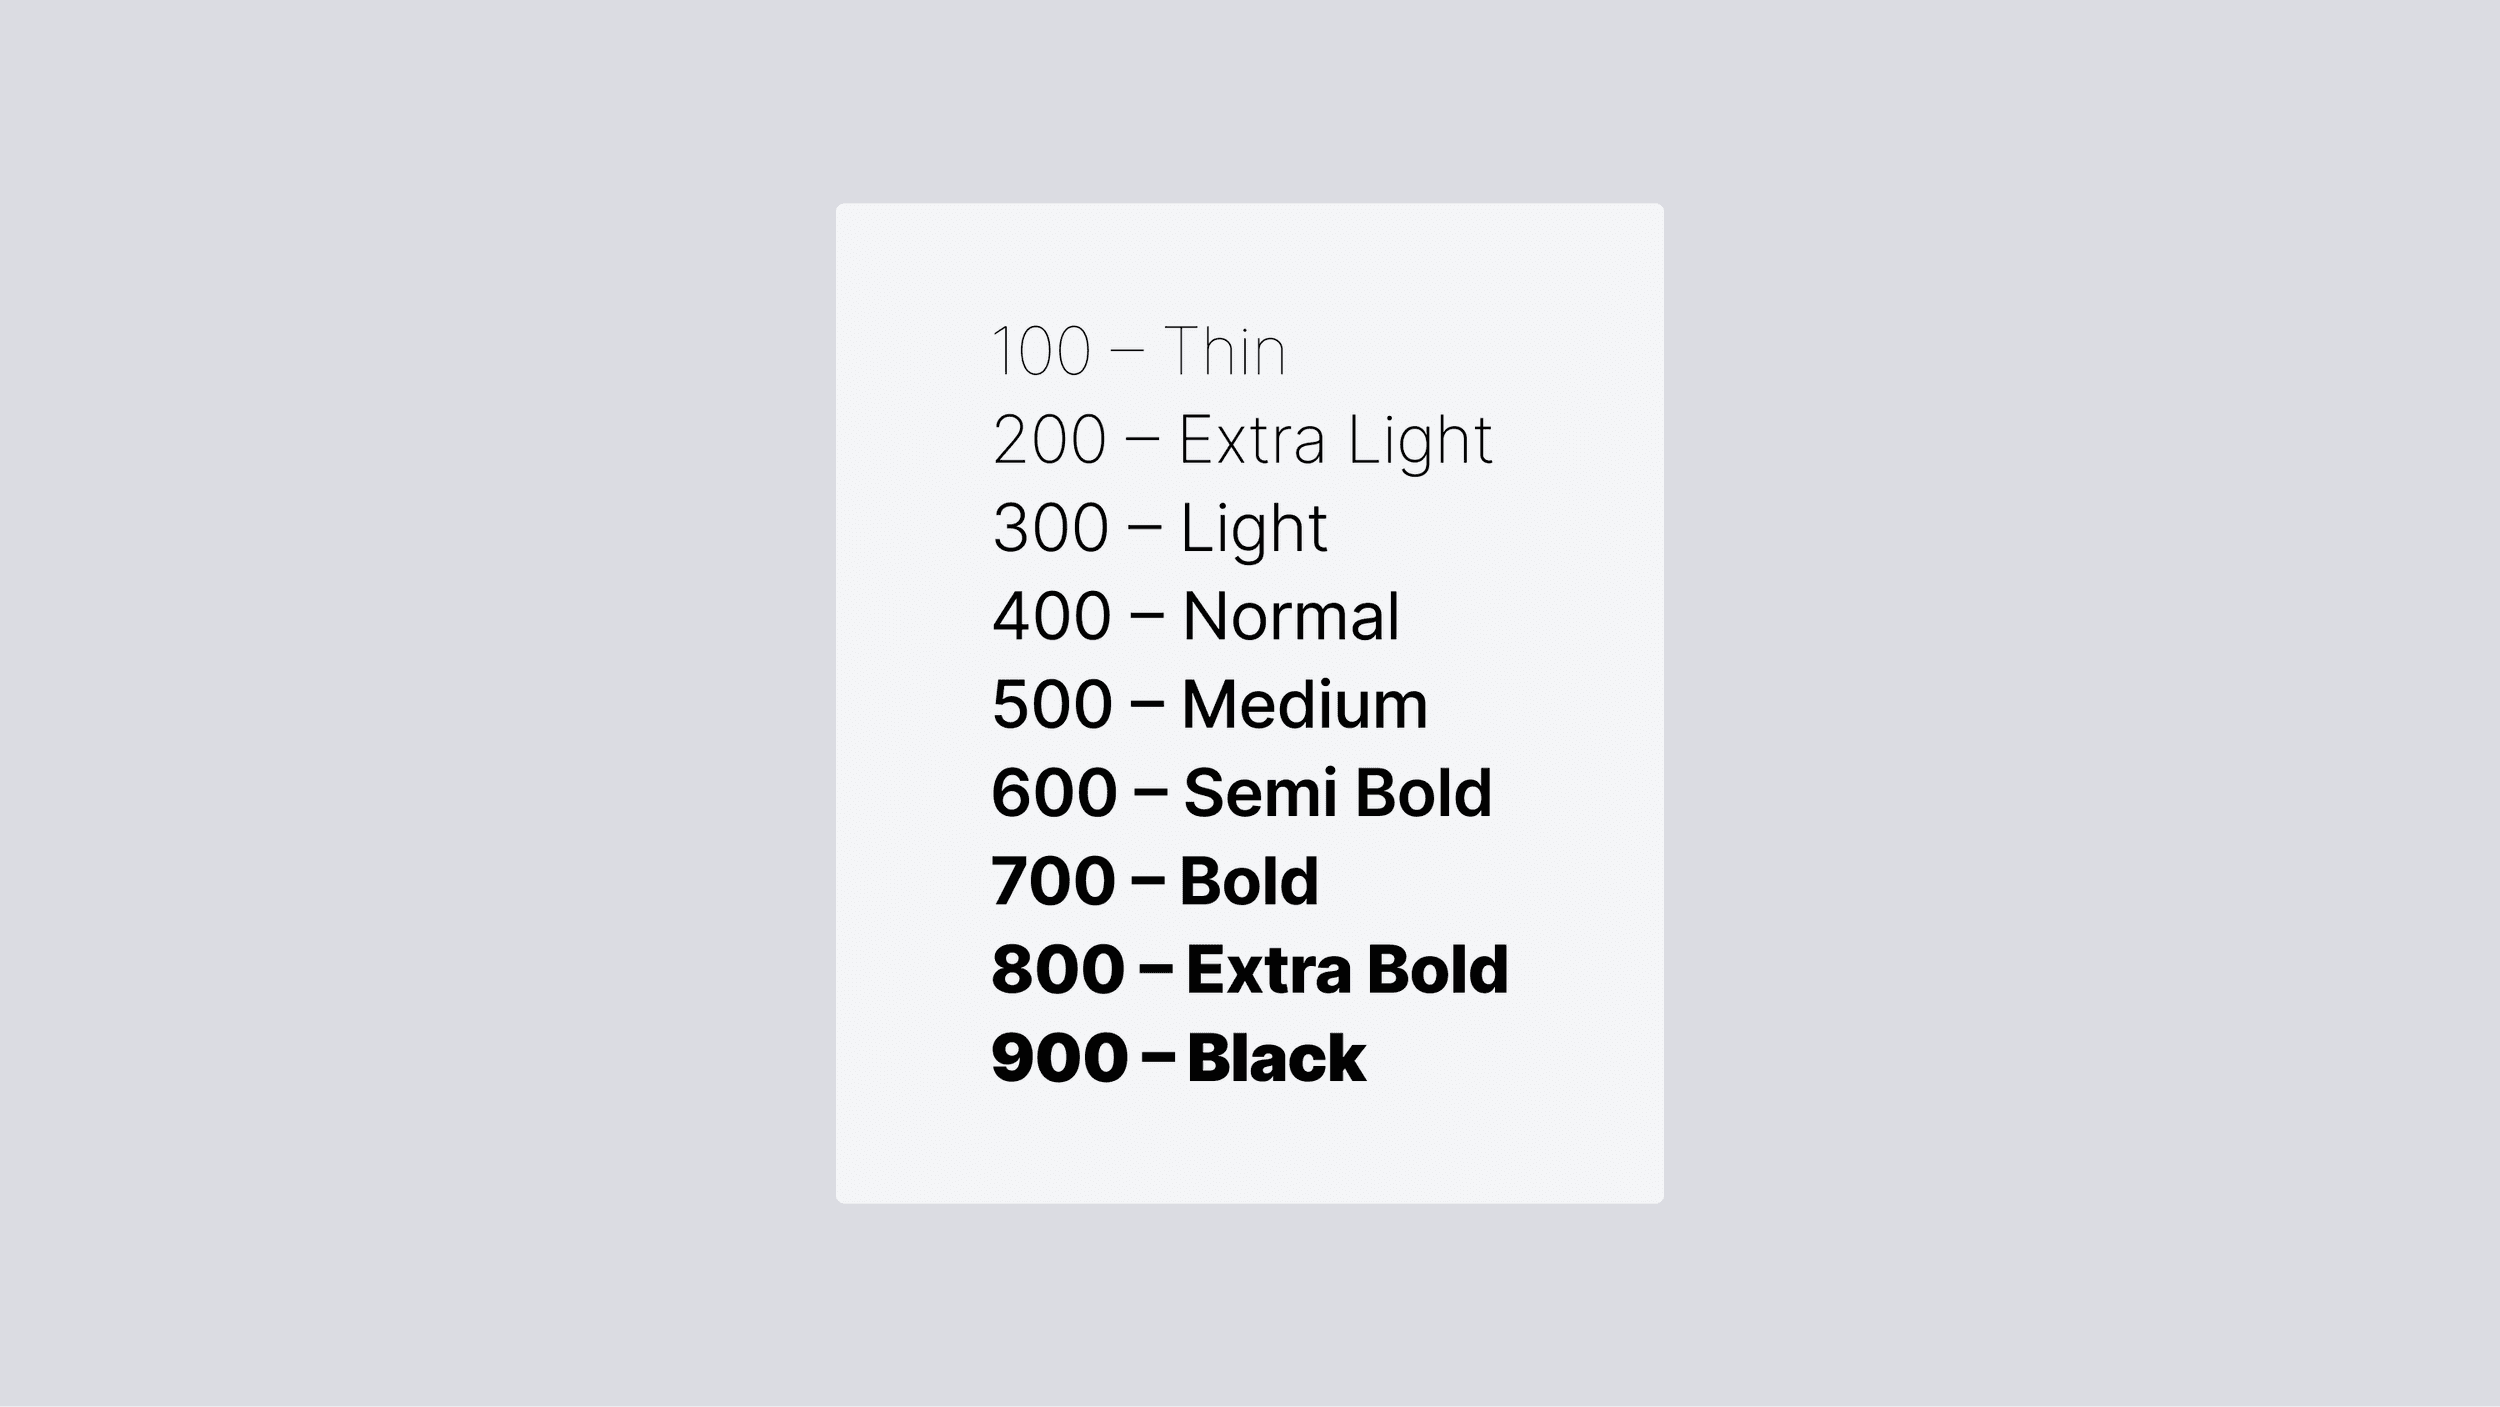
font-weight: 400;}
First, replace the "YOUR FONT" in the font family with the name of the font you're uploading. Next, replace those placeholder links, starting with the "TTF URL HERE." Highlight that portion of code with your mouse, then click on the "Manage Custom Files" button again to reveal the three font files we just added. Simply click on your TTF file, and you'll see that the font URL automatically pasted into the code snippet. Repeat this process with the other two font URLs—double-check that you're not removing the parentheses in the snippet.Lastly, match the font-weight and font-style to the font you've just uploaded, then hit save.
Apply your custom font across the site
Now that you've uploaded your custom font to your site, it's time to see how your new font looks. If you've never used CSS code to adjust your site styles, copy and paste these code snippets, and you'll have no trouble at all.
The first option is to apply your font to every text across your site. This is only recommended if your text is very readable and clear, as it will be used everywhere (including the Squarespace editor interface).
//--- Apply Site Wide---//
* { font-family:"YOUR FONT" !important; }
Adjusting the font family (font name) is how we actually change the font. The chosen font name is technically irrelevant, just as long as you consistently reference that name. Though, it's handy to call it by its real name!
The second option is to apply your specific font directly, only targeting certain styles. This is most common when installing fonts and will lend the most control over your styling.
h1 {
font-family: 'YOURFONT'!important;}
h2 {
font-family: 'YOURFONT'!important;}
h3 {
font-family: 'YOURFONT'!important;}
h4 {
font-family: 'YOURFONT'!important;}
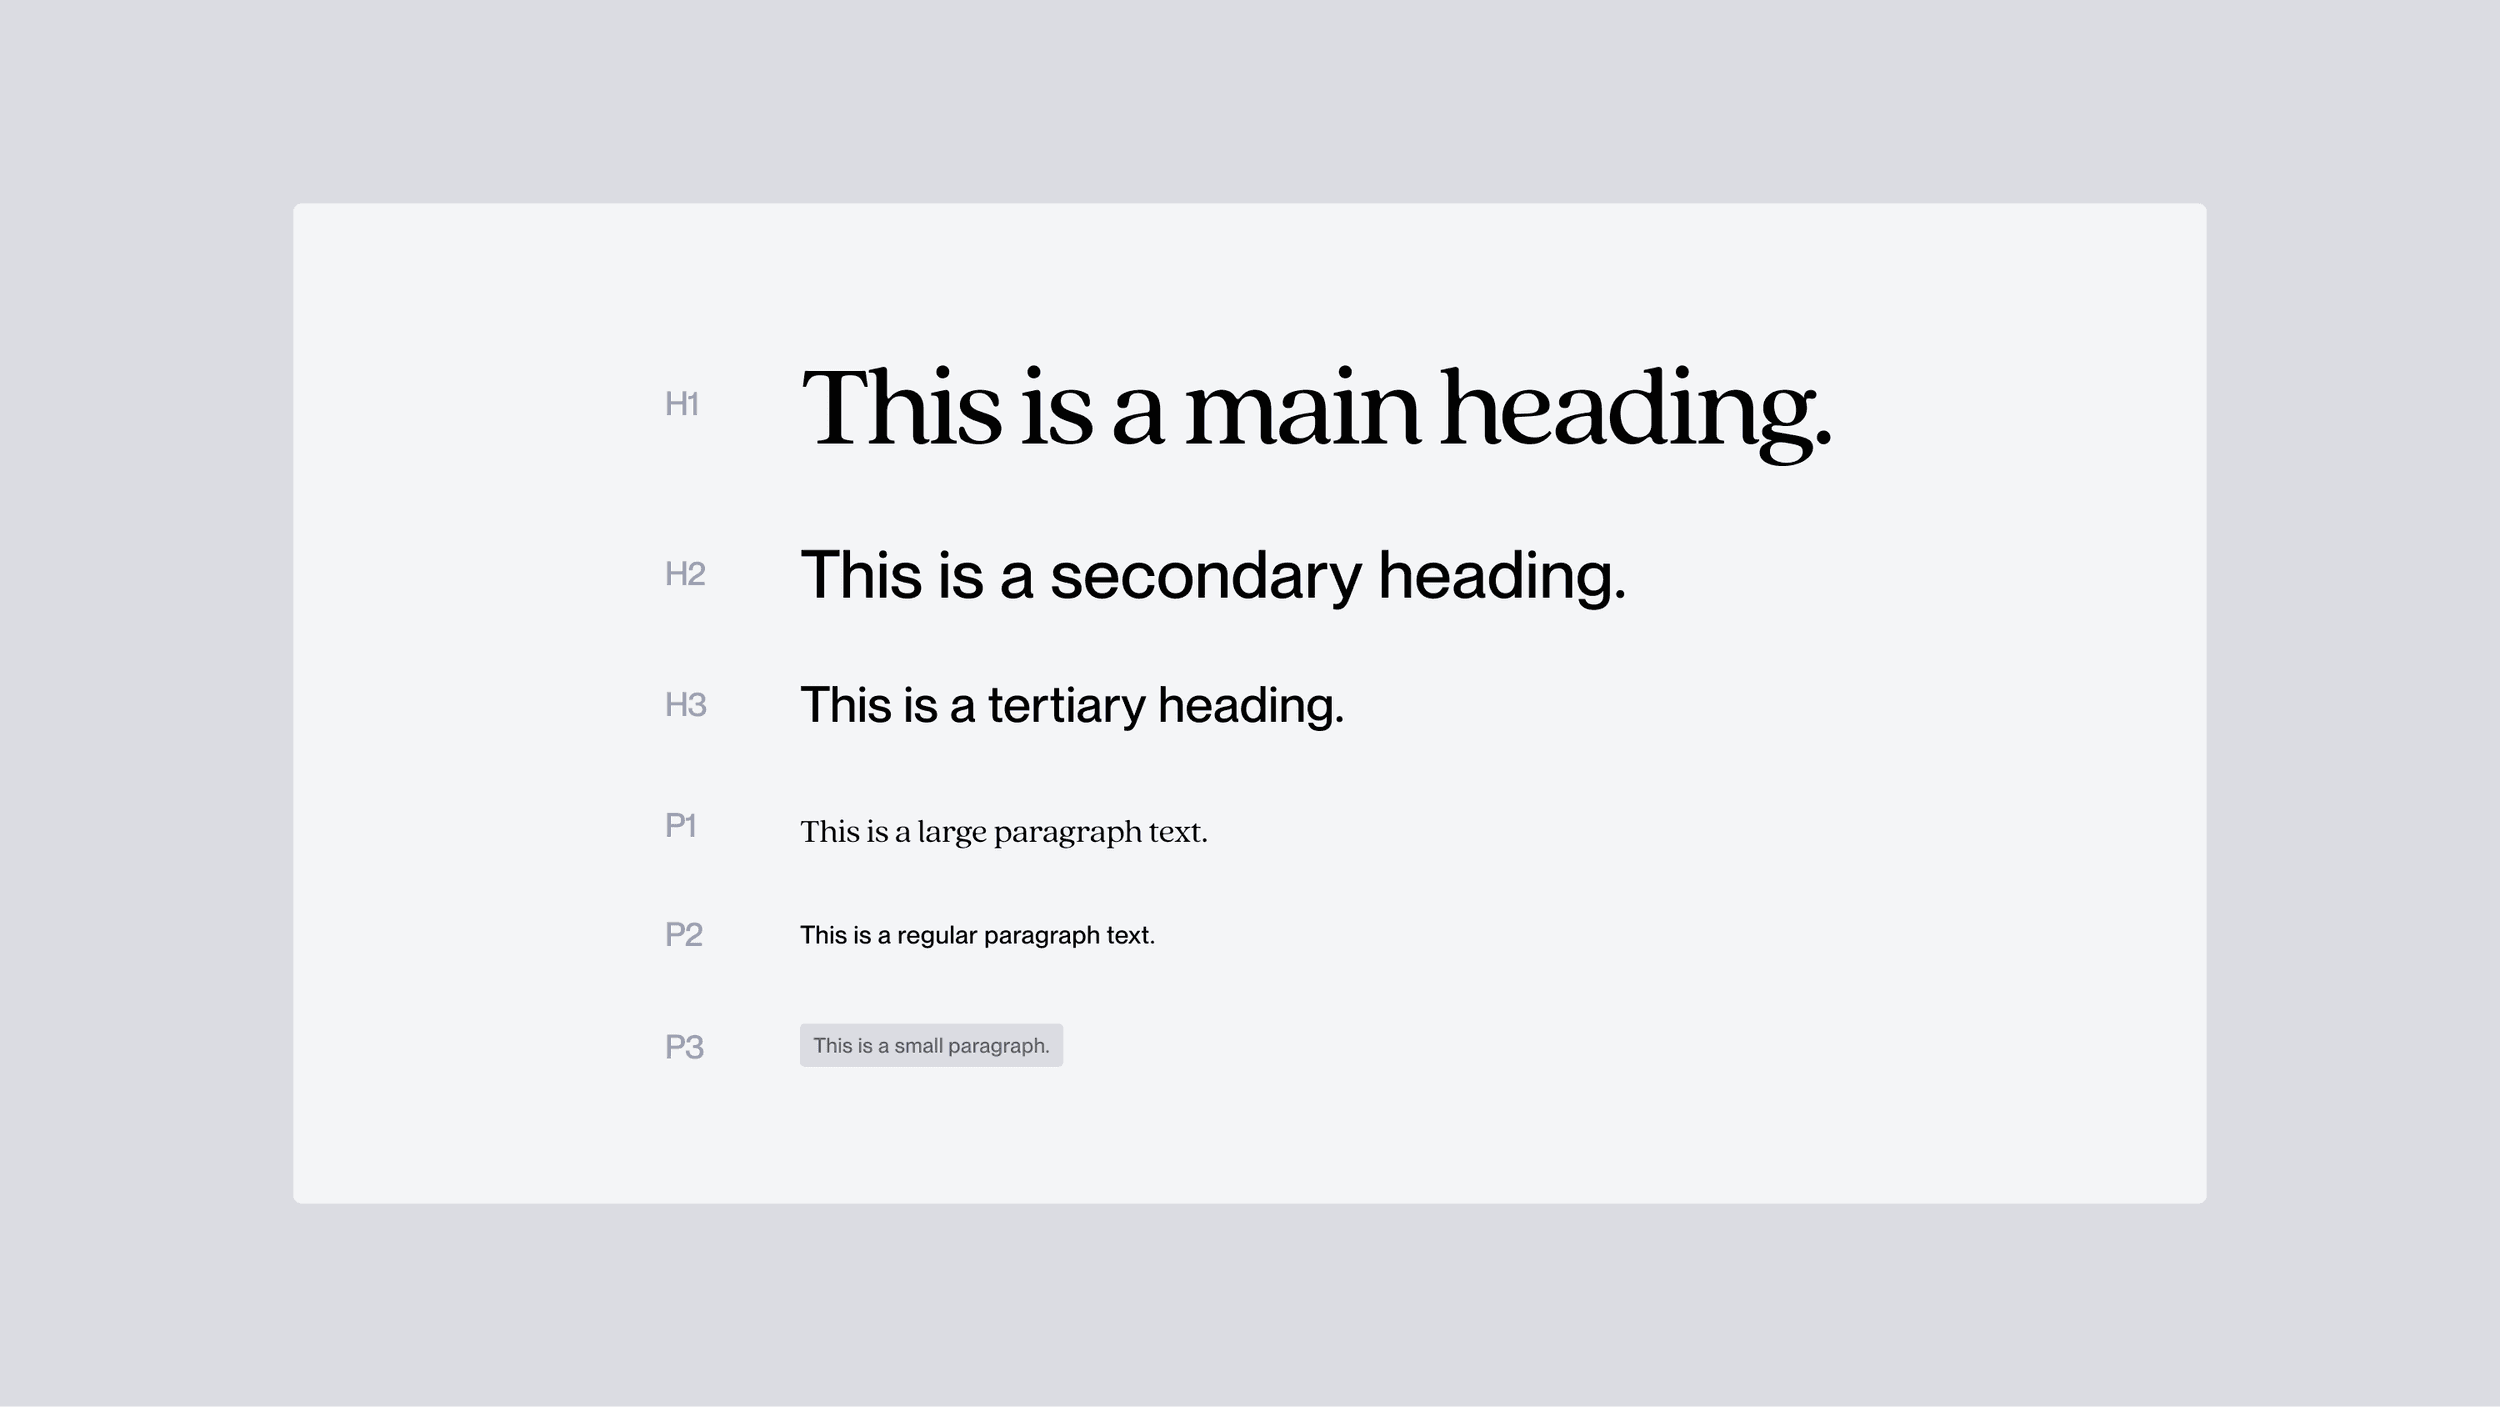
.sqsrte-large {
font-family: 'YOURFONT'!important;}
p:not(.sqsrte-large, .sqsrte-small){
font-family: 'YOURFONT'!important;}
.sqsrte-small {
font-family: 'YOURFONT'!important;}
To apply to only a few headings, you can also format it like this to save space. As usual, once you've made changes, click save.
h1, h2, h3 {
font-family: 'YOURFONT'!important;}
Using CSS to customize
Congratulations, you've installed a custom font on your site! If everything looks good, hit save one last time and call it a day. But if you'd like even more customization, stick around. Just look in Site Styles under Fonts to get an idea of what we can change.
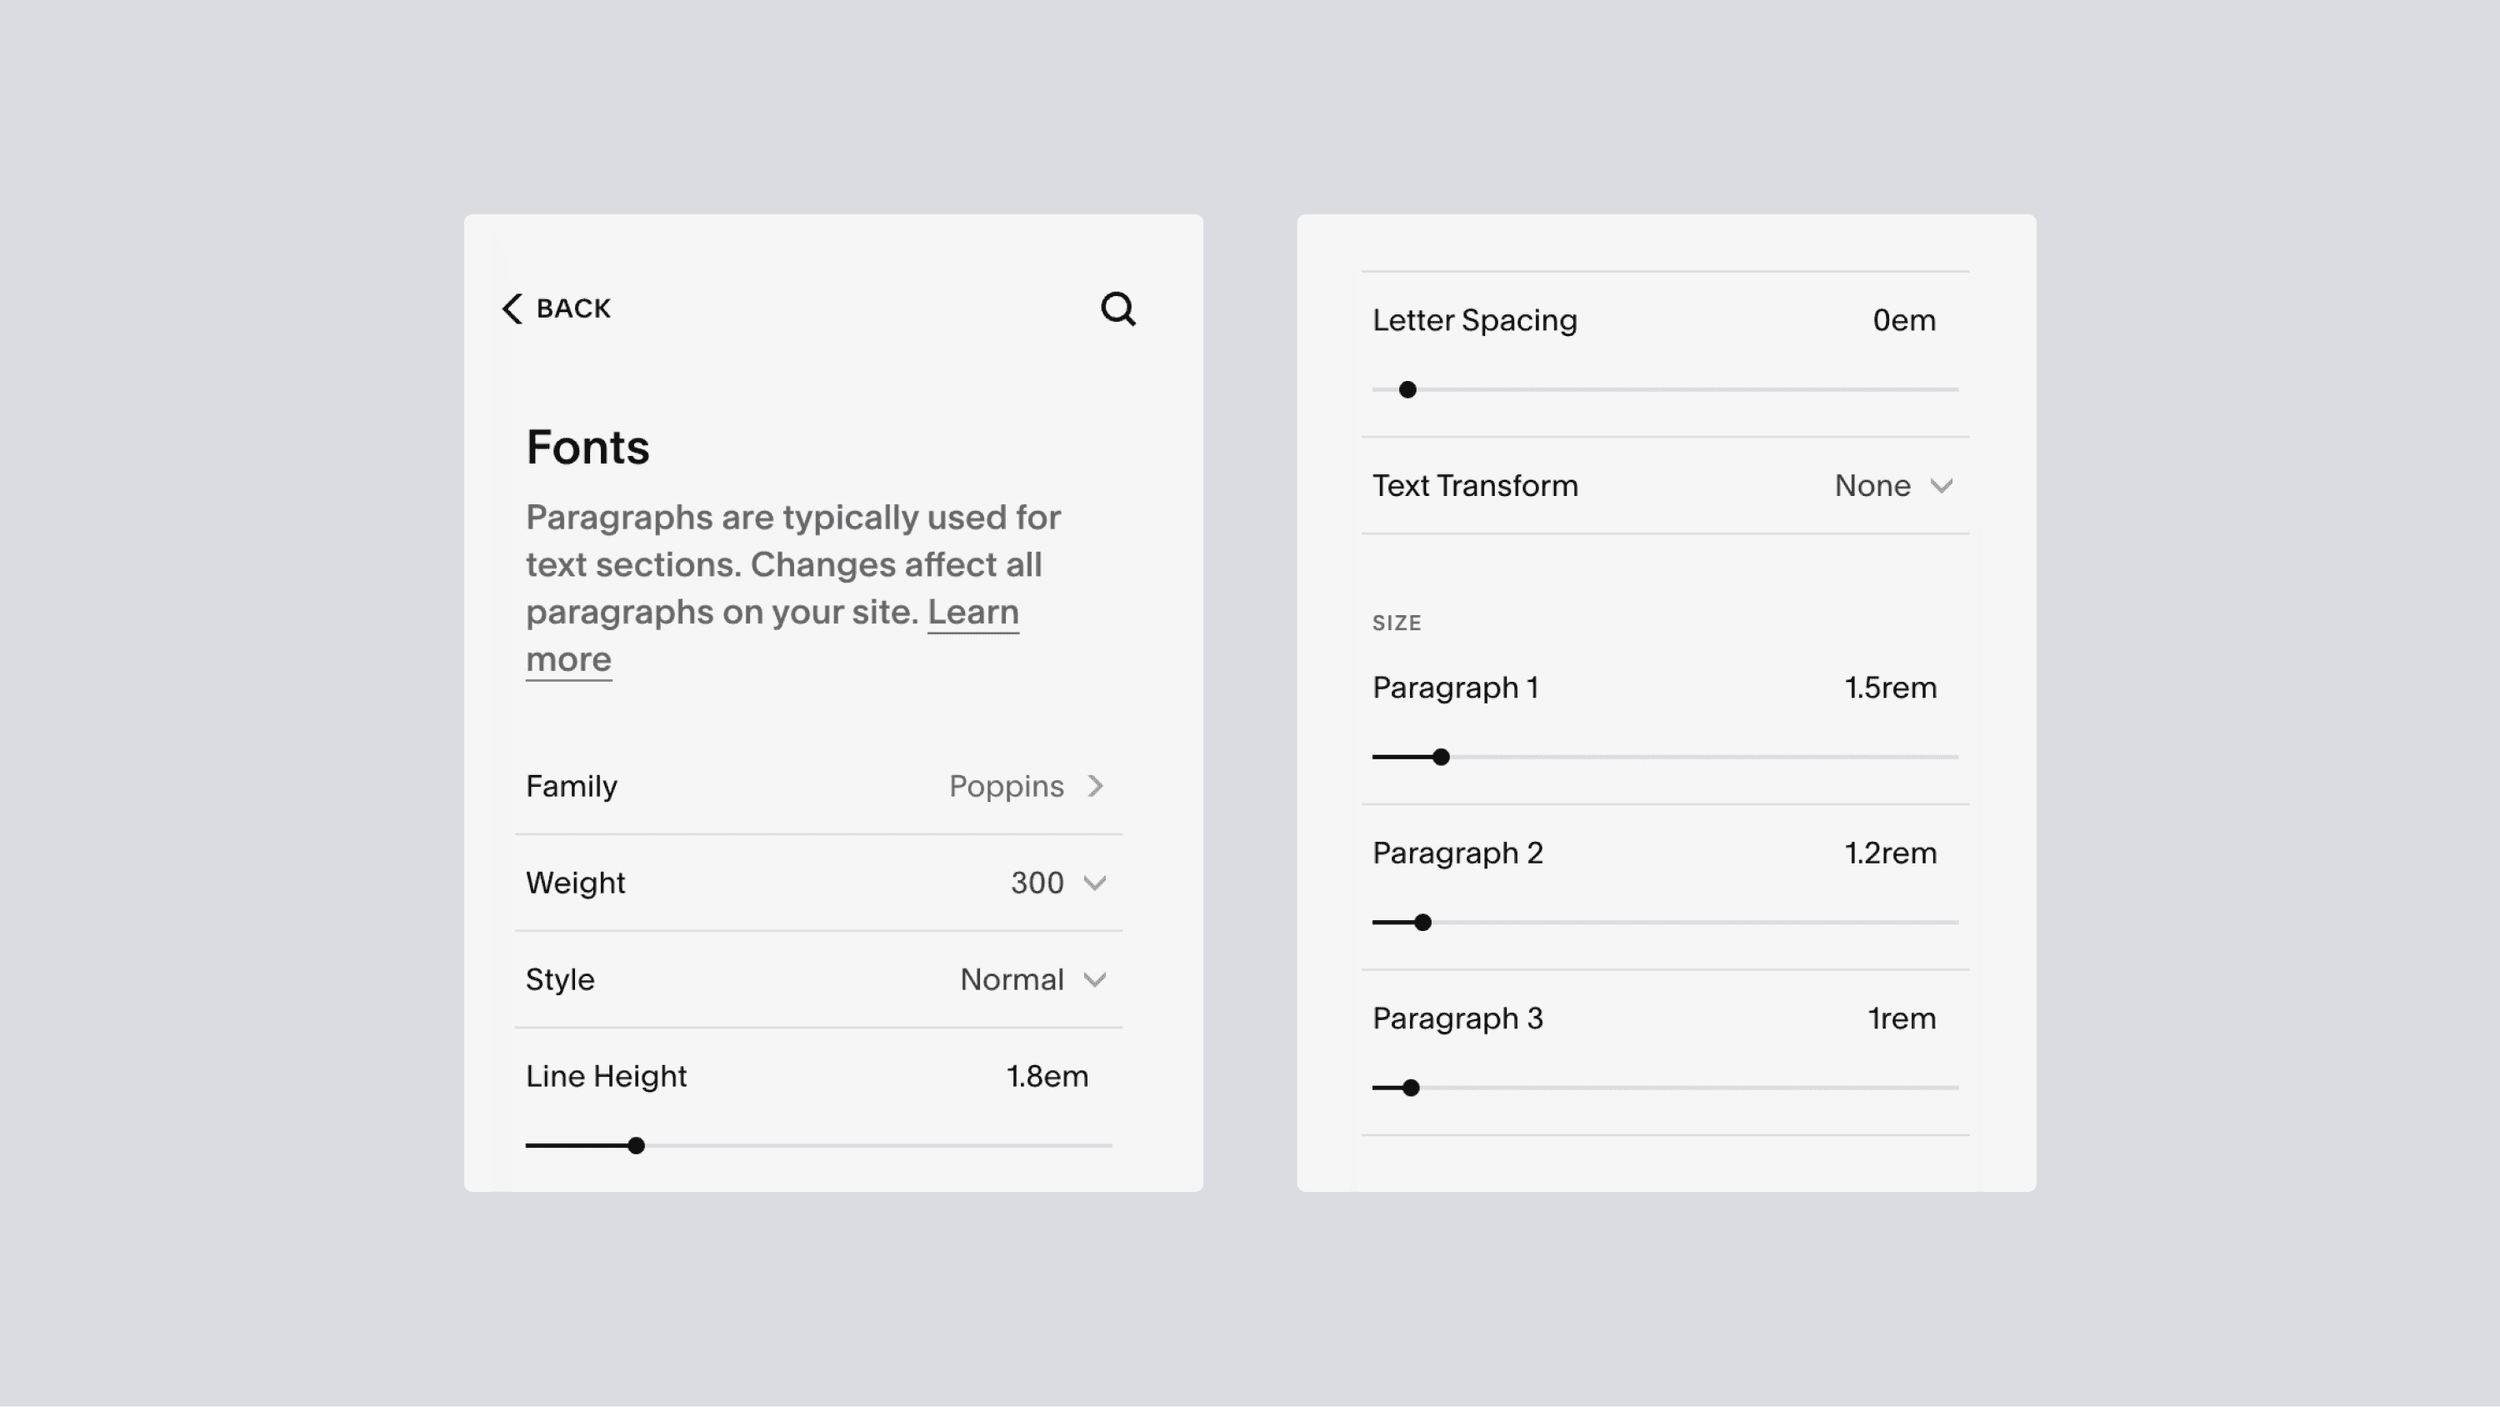
If you applied the specific font to headings (h1, h2, h3), you could change the settings in the Site Styles panel. This is the easiest way, and we'd always recommend using the Squarespace editor interface as much as possible. But, if you want more modular control over specific settings, we can achieve that with CSS:
h1{
font-family: 'YOURFONT'!important;
font-size: 50px !important;
color: #0F00FF !important;
line-height: 1.3 !important;
text-transform: uppercase !important;
letter-spacing: .05em !important;}
Each of these font settings responds just like the Site Styles panel: Adjust font size, color, line height, text transformation, letter spacing, and more. Remove what you don't need, and duplicate this process for other headings and paragraph text.
Important note
We're using !important for almost all of these statements because we're actively overriding the Squarespace website settings. Because we're not being very specific with targeting these headings, we must use !important to make it work.